
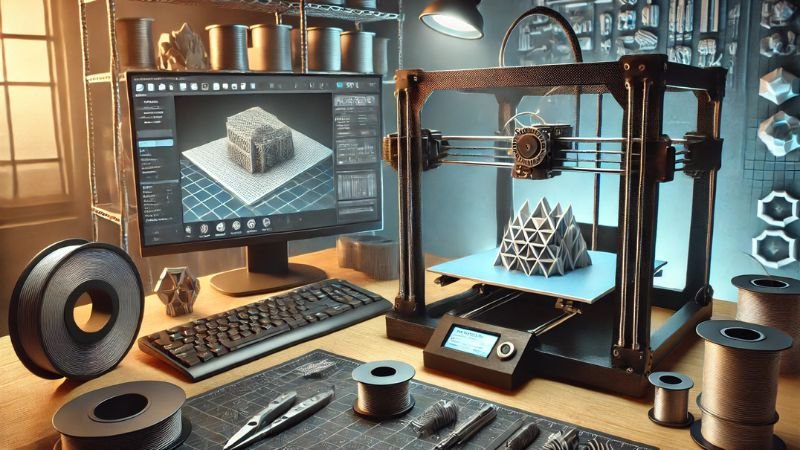
It’s important to find the best ways to do things now that 3D printing has changed how we make and test things. There are a lot of choices and features in Orca Slicer that can help users make their 3D prints better. The seven best ways to make your 3D prints with Orca Slicer better will be looked at. These will help you make prints that are fast, of high quality, and fit your needs perfectly.
Generated by AI.
Adjusting The Layer Height For Accuracy
Which layer is taller makes a big difference in how well your 3D prints turn out. It has a direct impact on how smooth and clear the print is. If you change the layer height in Orca Slicer, you can change how accurate it is. When the layer height is low, it takes longer to print, but the details are better. If you raise the layer height, printing might go faster, but it will be less detailed.
To work on a model with lots of features, choose a layer height of 0.1mm to 0.2mm. It might be fine to have a layer height of 0.3 mm for prints that go faster or models with less detail. It’s simple to discover the best mix with Orca Slicer since you can quickly change the height of every layer. Before you can really understand how layer height changes your work, you need to try out different options. You can get the grade you want without hurting the business if you talk this number down.
Changing The Print Speed To Get Better Results
Print speed is another important thing in 3D printing. Things can go wrong when you go faster, like losing your edge or not sticking together well. Most of the time, slower speeds mean better print quality but longer print times. You can change the speed in Orca Slicer so that you can work with different materials and more complicated models. One way to improve the look of pictures with lots of small details is to slow down the print speed to around 40–60 mm/s.
For simpler models, it might work better if you speed it up to 80–100mm/s without losing too much quality. The medium you are using can also change the best speed. Like, PLA might work better at faster speeds, but ABS or PETG might need slower speeds to keep them from warping or breaking in other ways. Change the print speed slowly in Orca Slicer until you get the best quality and speed. This is what you need to make sure your pictures are good.
Optimizing Infill Density And Pattern
The shape and amount of the filling make a big difference in how strong, heavy, and nice they look. To get the mix you want between these things, you need to make sure you use the right finishing choices. The filling density in Orca Slicer tells you how much material is used inside the model. It is easy to change. A print with less filling density saves time and material but might not be as strong. A print with more filling density is stronger but heavy.
You might want to use a filling rate of 50–70% for useful parts that need to last. It may be enough to fill 15% to 30% of parts that aren’t very important or models that are just for looks. How strong and bendy the end picture is also changes based on the filling design. Patterns like a grid or honeycomb are good for strength and print time. You can switch between the different fillings in Orca Slicer so that it works best for each job.
Calibrating Extruder Temperature
The temperature of the extruder is very important for making sure that the filament moves and sticks correctly. Things can go wrong when the temperatures aren’t right, like sticking, bad layer bonding, or under extrusion. Different temperatures should be used for each medium for the best effects.
A good temperature range for PLA is between 190°C and 220°C, while a good temperature range for ABS is between 220°C and 250°C. In Orca Slicer, you can set the exact temperatures for the type of thread you have. It’s important to follow the maker’s instructions and make small changes as needed.
Change the temperature by 5°C at a time until you find the best setting. Be sure to start with the suggested temperature. If you look at the first few layers of your picture, you can tell if you need to make any more changes. Setting the extruder temperature properly makes sure that the printing process goes smoothly and reduces the chance that prints will fail or be of poor quality.
Perfecting Bed Adhesion Techniques
The bed needs to stick well so that prints don’t come off, especially in the first few levels. What if there isn’t enough glue? The fabric might twist, move, or come off the bed totally. One thing that Orca Slicer lets you do to make the bed stickier is to use a brim raft or skirt. It can be very helpful for models with small feet to have an edge because it makes more of their feet touch the bed.
A raft can help you stay stable, but it might be harder to get rid of later. The print doesn’t change because the skirt helps the printer get ready. Having a flat area and making sure it is clean with sticky sprays or tapes can also help. Clean and fix your bed before each print to keep binding issues at bay, and make sure your prints start strong and stay stable throughout the process.
Conclusion
To get the best results from your Orca Slicer 3D prints, you need to make sure that the choices are just right for you. To get good results fast, you can fine-tune things like layer height, print speed, filling, and temperature. You can make prints that look like they were made by a professional if you use Orca Slicer’s advanced features and keep the program up to date.
Read our other Technology related content here.
